
Of course, there are lots of free templates that offer scalloped mats, and lots of digiscrap kits come with scalloped mats for journaling, etc. Sometimes, however, you just need to create your own in order to meet your needs. Or searching for those shapes to use them for clipping masks can take up a lot of time, to. Today, therefore, I’m going to share how very simply and with little effort you can create your own scalloped mats. I’ll create a round mat, but you can do any other shape as well.
Here’s how it works:
Step 1: Create a Path
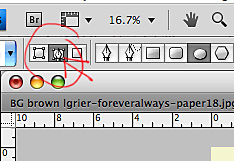
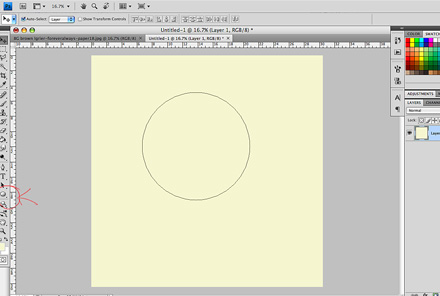
If you are working on a layout already, simply add a new layer (windows key + shift + N) to your canvas (or open a new canvas and add a new layer. Choose the shape tool (I picked the Ellipse Tool for the round shape), and make sure you select the path option (at the top right of your photoshop screen).
Holding the shift key, draw a circle.
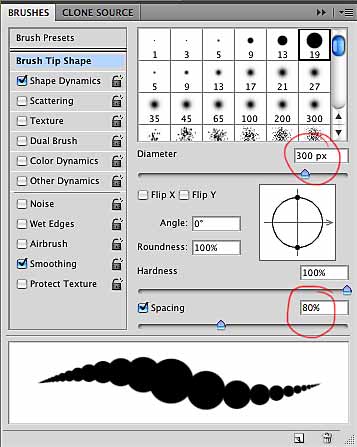
Step 2: Choose Your Brush Settings
Select the Brush Tool (B), and choose your settings. For this scalloped mat, I used a Hard Round Brush, and changed the diameter to 300 px, and the spacing to 80%.
Step 3: Apply the Brush
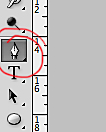
From your tools pick the Pen Tool (P).
With this tool selected, hover over your round path, right click and choose “Stroke Path.”

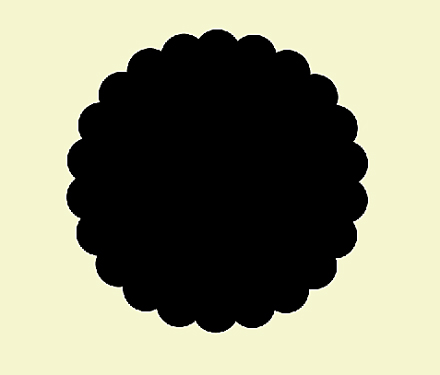
A window will pop up. Make sure that “Simulate Pressure” is not checked. Then click ok. Now you have scalloped circle, and all you need to do is fill the inside of the circle.
Step 4: Fill the Circle
Where your layers panel is, select the tab that says “Path.”
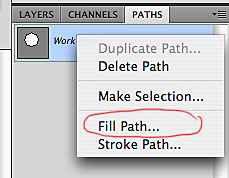
The path you used to create the scalloped circle will show up there. Right click on the path layer and choose “Fill Path.” A new menu will open, and – using the default settings – all you need to do is click ok, to fill the path.

Now your scalloped circle will be completely filled, you can delete the path (right click on the path layer, choose delete), and there you have a nice round scalloped mat. Simply clip your papers to the mat, and you are good to go.
Tip:
1. You can apply the same method to rectangular and other shapes as long as you use the path tool.
2. Play around with your Brush settings to get larger, smaller scallops, or change the spacing.