
It’s time for our monthly Photoshop tutorial, and I thought, today I’d like to take you to the world of Bevel & Embossing. In other words, I’m going to show how you can create a design tray similar to the one I did just the other day.

What Inspires Me ...
SSD has a challenge this month, for which they used a really cute design tray as inspiration, and I loved the image so much, that I wanted to try my hands on this kind of design. The problem: I don’t have any such design tray – neither in my digiscrap stash, nor a physical one at home. But I had an idea of how I could achieve a somewhat similar look digitally, and here is what I did:
1. Create a blocked background
I started by creating a blocked background with the Rectangle Tool on my blank canvas.
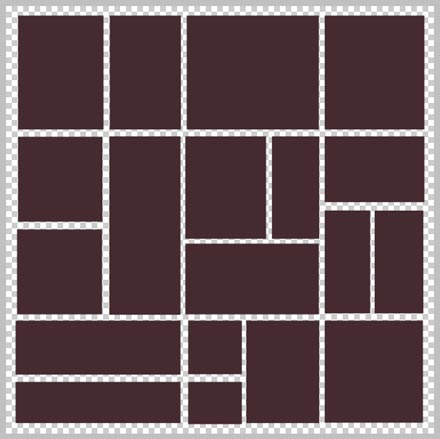
After filling the whole canvas with blocks of various sizes, I selected all the layers in the Layers Panel, and duplicated everything. The duplicated layers I merged into one layer; the original layers I grouped together (windows key + g) and made the group invisible to keep things organized (click on the eye next to the group symbol in the layers panel to hide the group).
2. Create the grid for the tray design
With the merged layer of my blocked background selected, I chose the Magic Wand Tool and clicked anywhere outside the blocked shapes. (This selects everything but the merged layer.)
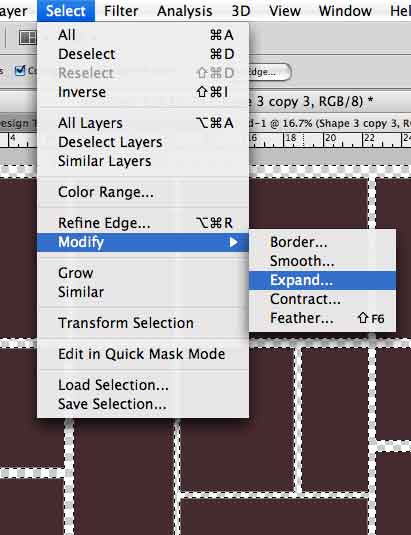
Then I expanded the selection (marching ants) by the value of about 20-25 (go to Select > Modify > Expand).
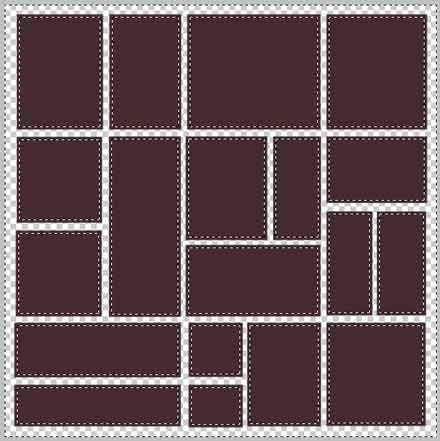
I created a new layer (press Shift + Windows Key + N) and filled it by clicking inside the selection with the Paint Bucket Tool. (The color of your grid doesn’t matter for now, since papers will be clipped to everything later.) The blocked background layer I hid by clicking on the eye-symbol next to this layer in the layers panel.
3. Apply Bevel Style
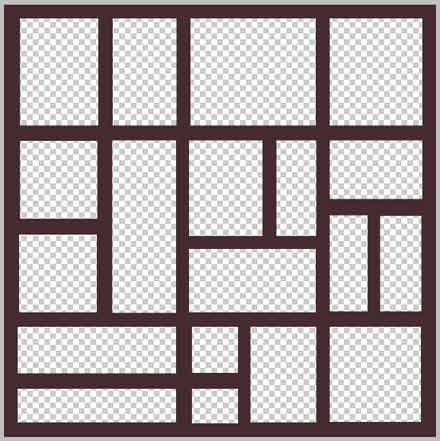
Now, the fun part begins. I picked a paper (dark brown for a more wooden feel), clipped it to the grid and merged both layers. I made sure the merged grid layer was selected, then I clicked on the little FX field (at the bottom of the layers panel), to open the styles menu, and chose Bevel and Emboss … from the listed options. This opens a new window with lots of values that can be modified.

For my design tray, I chose the following settings (though you can play with these and see what happens on your canvas):
- Style: Inner Bevel
- Technique: Chisel Hard
- Depth: 1000%
- Direction: Up
- Size: 16
- Soften: 13
For everything else I kept the default settings. (However, you might want to pay attention to the value you use for the Angle (Shading), because it should be identical to the angle you use with your shadows for consistency.)
That’s it.
Before you click the ok button, you also might want to add/adjust your shadows, because you will lose your settings when you click on another predefined style in your styles panel. (If you are like me, you use shadow styles, and if you want to use those styles, apply them before you actually modify the bevel.)
Now, you can go back to your group layer (blocked shapes), ungroup them (windows key + shift + g), and clip papers to them, add your embellishments, photos, word-art – putting it simply: you can play with your design tray.
Tip:
I use the same technique (Bevel and Emboss) to create my own frames, elements and occasionally even an alpha from any given paper/shape. Simply adjust the values to what best fits your needs. (Try also playing around a bit with the Chisel Soft or Smooth technique to see what happens – you might prefer that look to the Hard Chisel Technique setting.)
I am trying this, but I am stuck on ungrouping, how do I ungroup?
Sorry, should have included the shortcut keys for grouping and ungrouping, but since I have a Mac, I’m not sure whether it’s the same on a windows computer. Here’s what I do: windows key + g for grouping; windows key + shift + g for ungrouping (windows key is the apple key on a Mac keyboard). Or in the layers panel, right click on the group you want to ungroup, and then one of the features showing up is “Ungroup Layers” – easy peasy!