

Anzeige (Enthält Produktempfehlung) / Advertisement (Contains product endorsement)
English
Here comes the next card. This one is a birthday card based on the theme that time flies. I picked a paper that symbolizes time with the clock. And the butterfly flies.
Deutsch
Hier kommt die nächste Karte. Diesmal gibt es eine Geburtstagskarte, mit dem Thema: Zeit verfliegt. Dafür habe ich ein Papier gewählt, das dank der Uhren Zeit symbolisiert. Und Schmetterlinge fliegen natürlich.
- Origami Paper
- Scalloped Square Die
- Square Die
- Birthday Stamp Set
- Origami Papier (von Aldi)
- Qudratstanzen (einfach & mit Bogenkante)
- Stempelset: Geburtstag
Since I was working with origami paper, it wasn’t ideal for gluing. But I loved how the papers coordinate and wanted to work with them anyway.
Offengestanden war das Papier, das ich verwendet habe nicht bestens für ein solches Projekt geeignet, da es eigentlich Origamipapier ist. Aber mir gefiel, wie das Papier aufeinander abgestimmt ist, und so habe ich es dennoch verwendet.
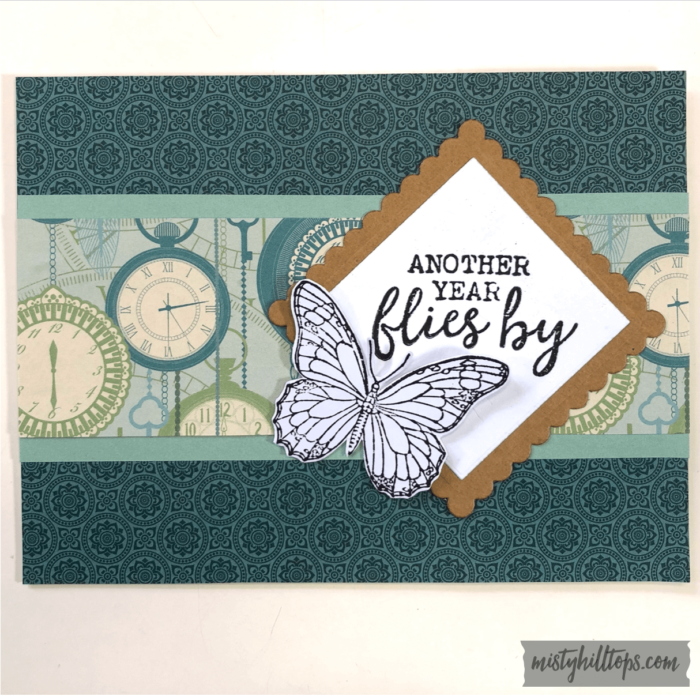
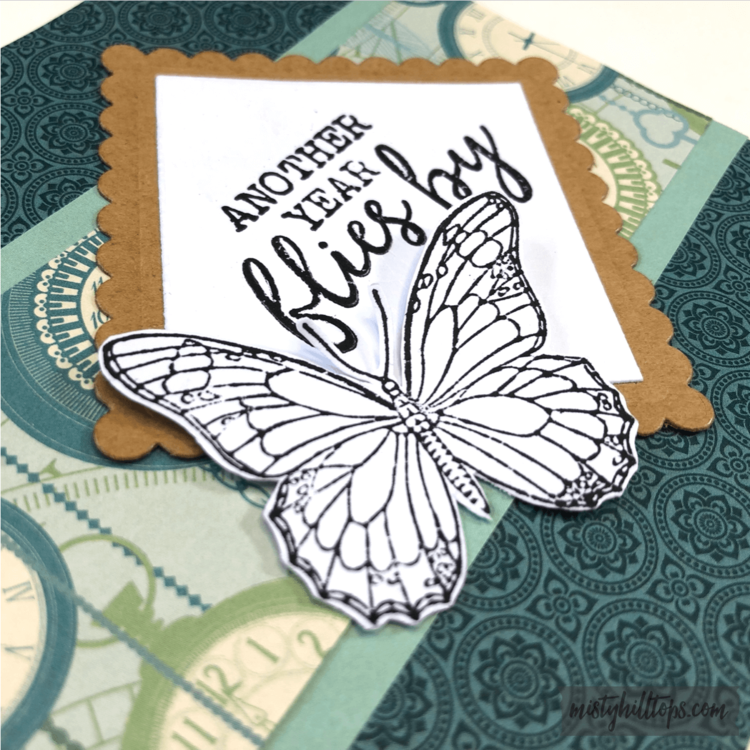
I began by cutting all the paper pieces and the card base. Then I stamped the butterfly and sentiment. I wanted that out of the way to give the stamps time to dry. When I stamped the sentiment, I paid attention to stamp it on the plain square so it is diagonal. Next, I fussy cut the butterfly, and then it was time to assemble the card.
Zunächst habe ich alle Papiere zurechtgeschnitten, und auch die Kartenbasis. Dann habe ich den Schmetterling und den Gruß gestempelt. Ich wollte das frühzeitig tun, damit die Stempel Zeit zum Trocknen haben. Außerdem habe ich beim Stempeln des Grußes darauf geachtet, dass das Quadrat dazu diagonal liegt. Dann habe ich den Schmetterling ausgeschnitten und es wurde Zeit, die Karte zusammenzustellen.
I began with the background. Then I glued down the strip that goes across the page. I wanted that strip to be matted. But instead of cutting one larger strip of paper from the paper, I simply cut two narrow strips which I attached beneath the top and bottom of the other paper strip.
Ich habe mit dem Hintergrund angefangen. Dann kam der Papierstreifen. Eigentlich sollte der hinterlegt sein. Aber ich wollte nicht einen großen Streifen des Papiers verschwenden, so habe ich einfach zwei kleine Streifen geschnitten, die ich dann oben und unten unter den Streifen geklebt habe.
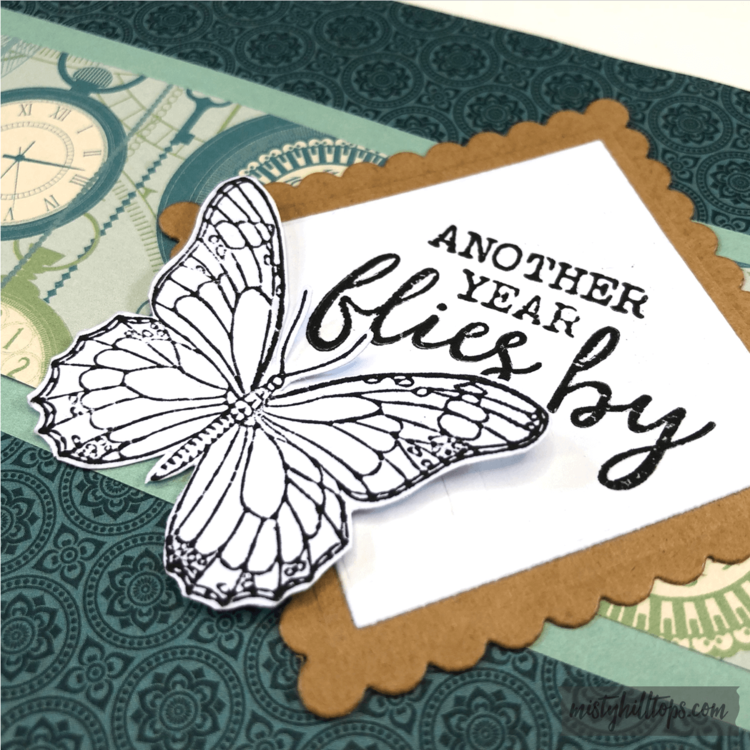
Finally, I adhered the square with the sentiment to the scalloped square, fastened that to the card, and added the butterfly.
While the wings of the butterfly aren’t glued down, I’m aware that the pop-up effect gets lost the moment this card goes into an envelope.
Zum Schluss kam dann das Quadrat mit dem Gruß auf das Quadrat mit der Bogenkante, und das wurde dann auf die Karte geklebt. Zusammen mit dem Schmetterling.
Auch wenn die Flügel des Schmetterlings nicht angeklebt sind, damit sie eigentlich abstehen können, ist mir bewusst, dass sobald die Karte in einen Umschlag kommt, der dimensionale Effekt mehr oder weniger verloren geht.
Here is a process video of how I created this card:
Hier gibt’s noch das Video zum Ansehen:

And once again, this card comes with a free Silhouette/SVG cut file that you can download below.
Just remember that the Terms of Use for Misty Hilltops Designs apply.
Und wieder einmal gibt es für diese Karte eine kostenlose Silhouette/SVG Schneidedatei, die ihr unten herunterladen könnt.
Bitte beachtet nur wie immer die Nutzungsbedingungen für Misty Hilltops Designs.