All posts tagged: hybrid

Hybrid Hub: Soar

Spring is still in full swing (although here it has been feeling more like summer, lately), so I’ll continue to show you some of my spring-themed cards. This one was created with Kristin Cronin-Barrow’s “Hippity Hop” Easter scrapbook kit (see “Monday Highlight: Hippity Hop” for more details). The kit comes with such beautifully patterned papers in great springy colors, that they are perfect for card-making. The paper piecing pattern for the butterfly I downloaded from scrapbooks.etc. This card is yet another example of how – with very little effort – you can create a pretty project that will be an enjoyable experience even for those not used to paper crafting!

Hybrid Hub: Happy Times

Last week, I shared with you some Easter card inspiration from scrapbooksetc.com. Of course, I couldn’t just share this with you, and not try my hand on some of the ideas they have to offer on their website. So, I downloaded their paper piecing patterns (you have to sign up for that, but it’s free), and started playing. For this card, I used the ladybug paper piecing pattern. After all, it’s spring, and I wanted to create a spring-themed, happy card.  I added the scalloped circle (two layers), the gingham paper for the background, plus a green mat, added a little sentiment, and that’s all there was to this card. I love how fun and easy it is to turn those paper piecing patterns into cards. For this card I used Libby Pritchett’s digiscrap kit “And Your Bird Can Sing.” The bright, patterned, fun papers work great for hybrid projects and cards (as do many of Libby’s products in general). Stay posted, for I have more to come in the next couple of weeks.

Hybrid Hub: Thank You Card No. 4

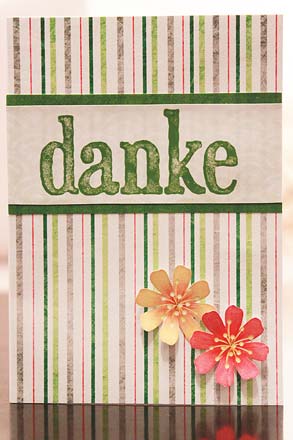
I have another thank you card for you today – one that I created last summer. For this one, I used Lliella Designs’ “Panda Zen” – an Asian-themed digiscrap kit. And the sentiment I “stamped” before printing, using Heather Roselli’s “Stampy Goodness Alpha” stamps. Creating this card was very easy, since it has a very simple design: for the background I simply used the striped paper that comes with the kit, and on top I added the two layers for the sentiment. Lastly, I arranged the two flowers at the bottom, bent them a little for a better 3d feel, and there is another simple card again.

greeting card

Hybrid Hub: Thank You Card No. 3

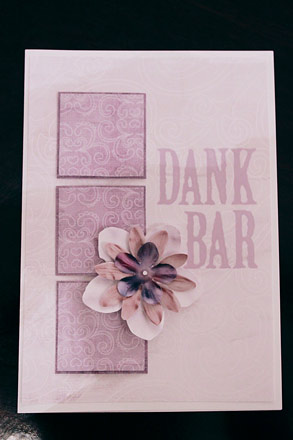
We are going purple with the hybrid hub today: I have another thank-you card that I want to show you. For this card, I used Shawna Clingerman’s “Strong Enough” digital kit, and worked with several layers. On the main background mat, I “stamped” the word “thankful” (using an alpha from Darcy Baldwin’s “My Stamp Pad”). After designing everything in photoshop, I printed each layer separately, and assembled the card. Note that the three squares each come in two layers, the dark purple background layers, and the patterned top layers. And since I can’t just easily buy fabric flowers here, I printed them, too, cut them, and stuck them on top of everything. There goes another really easy to make card.

greeting card

Hybrid Hub: Thank You Card No. 2

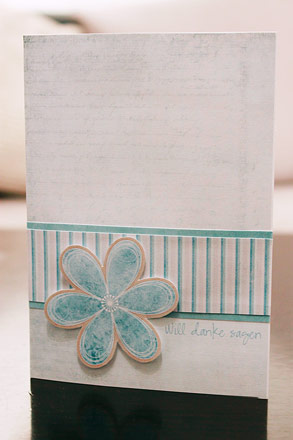
I have a new hybrid project, I want to show you. It’s another Thank-You card. There are so many reasons to be thankful to those around us, so it’s hard to keep up with showing my appreciation. But cards are a great way to demonstrate your thankfulness, especially when they come handcrafted. For this particular card, I used “Just Breathe” by Kristin Cronin-Barrow and Lauren Grier (available at sweetshoppedesigns.com). Creating this card was fairly simple, since the kit comes with beautiful papers that you really want to show off. I just sized everything on my computer, printed it off on cardstock and assembled it. Note that the sentiment (translated it means: “Wanna say thank you”) is printed directly on the background paper, which was possible, because I always fully design my cards before copying and pasting everything separately onto a new blank canvas for printing.

Hybrid Hub: Thank You Card No. 1

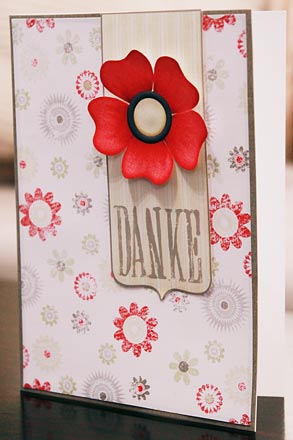
I haven’t posted anything about hybrid in a long time. That’s probably, because I haven’t done much hybrid in quite a while. Still, I do have some projects I worked on last year, so I guess, I can start sharing some of what I did in the past. And maybe that will motivate me to get back into doing more hybrid again. Today, I want to show you one of my very first hybrid projects that uses digital scrapbook supplies. It’s a thank-you-card. Now, keep in mind that I am living in China, which means there is no craft store anywhere near the place where I live. Not any craft stores at least as we know them in other places of the world, where they  offer tons of supplies: flowers, ribbons, beads, stamps, etc. So, I have to make do with whatever I have available, and that is basically my printer. So, usually, I just design my cards on the computer, print everything, and assemble. Since digital scrapbook supplies usually come in great quality, printing …

DIY: December Daily 2010

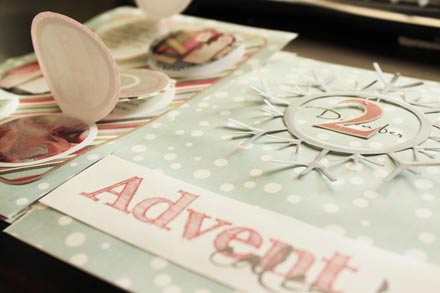
  I promised you I would keep you up-to-date with my December Daily project. Well, time got the better of me, and with all the Christmas celebrations going on, there was hardly enough time for anything at all, but I did manage to get a couple of pages done, and I’m still working on some more.   As I told you already, it is a rather interactive book – with lots of background information about Christmas. But as there is lots to discover, I hope it won’t get my readers too bored (once it’s done). Generally, I went for irregular page sizes. This makes assembling for me easy, because I don’t have to have each page matching perfectly. It has a really random feel to it and I’m glad I decided to do it that way. I’ll keep adding to the December Daily photo gallery, as I get more pages done, so make sure to come back later to check it out.

DIY: Christmas No. 4

Christmas is fast approaching, but it’s still time to get those Christmas cards out, so today I’ll bring you another how to on creating your own Christmas card. First, as always, we need to create the card (with all the mats, background papers and embellishments) in our graphic program. This card is a rather simple one, so it only has five printable parts to it: Two background mats, the base for the ribbon, the label and the snowflake. I also used a white ribbon and a piece of string. After creating and arranging the different mats and elements in photoshop, I open a new canvas where I drag and drop everything and arrange it for printing. (Always make sure on the printing canvas to have nothing overlap!) Once I’ve printed everything, cutting and assembling starts. I use white cardstock (size A5) for the base layer, fold it in half and begin to adhere the two background mats on there. The order doesn’t matter, because the ribbon will cover where the two will overlap. I measure …

101209-DIY-IMG_3409

DIY: Christmas Card No. 3

There’s still time to send out those little Christmas greetings, so let me show you another one of my Christmas cards and what I did to create it: The card comes with five parts – two background mats, two center-piece mats and a ribbon. Simple enough, right? I used four different kinds of papers – one patterned one, and the other three ones are plain solid colored. Now, what’s special about this card is that the top layered mat has a lot of writing on it – all words that have to do with Christmas. So, while it took me some time to brainstorm all the different terms, assembling them wasn’t all that hard. Simply pick a lot of different fun fonts and arrange them on the mat until there is no more space left. The trick is: re-size. You can make some words big and bold, others can be quite small. That way arranging everything is a relatively simple task. Once you’ve clipped all the papers and finished arranging the wordart, you can prepare …