Today, I’m bringing you the first ever Do-It-Yourself tutorial on my blog! We are going to create a Christmas card and I will take you through the process step by step. Before we get started though, I should point out that being in China I don’t have access to all the wonderful craft supplies available in other places around the world, so there will be a lot of improvising, and for those with only a small budget available for their crafting, I’ll show how you can save on paper and supplies as we move along.
1. Choose a scrapbook kit or whatever papers you want to work with from your digiscrap stash. I chose “Joy to the World” by Kristin Cronin-Barrow (her Christmas kit is still available at the Sweetshoppe).
2. Open your graphic designs program and create the basic design. In my case, I decided to go with a bright background paper on which I will layer all the other papers and embellishments. I used Melissa Bennett’s “Matted” star (also SSD) to duplicate, resize and use as clipping mask for my Christmas themed papers, but any star shape will work to clip your papers to.
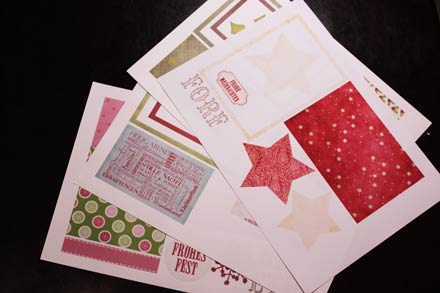
3. Arrange all the papers and elements separately in a new document that has the size of the printing paper you will be using. I’m working with A4, so my document will have the size of an A4 sheet of paper. However, printing cartridges are expensive, so in order to not waste any of my ink, I only crop a frame of the background paper which I copy and paste into my A4 document. In the center of that frame I can place other, smaller elements – in this case a star and the label. Since it will be covered by the large red-starred mat, the hole in the center of the background paper (from cutting out the elements) won’t matter.
Once I have arranged everything on my sheet of paper (I usually create several cards at once, so I can make sure I’m using all the space on my A4 sheet of paper), I print everything on white cardstock (simple white paper that’s a little thicker than normal printing paper will do).
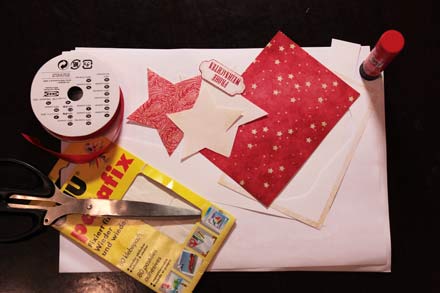
4. After I’ve printed everything, I get all my supplies ready. For this card I need scissors, a glue stick, some white tac (to adhere elements to my card) and red ribbon.
5. Since I don’t have any of those wonderful die-cut machines that are out on the market, I simply cut out everything by hand. Also, I use an A5 size piece of paper which I fold in the middle as the base of my card. Now the real fun beings.
6. Beginning with the background layer, I apply the glue stick to the paper and adhere it to the base paper. Next, I add the red mat, making sure it’s aligned neatly in the center of the background.
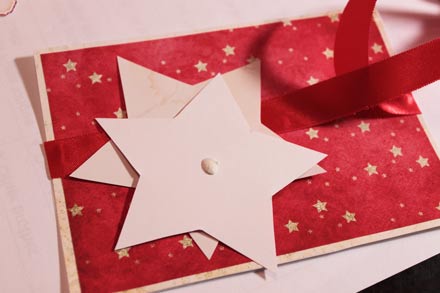
7. Then I take some of the ribbon (measure about how much I will need to make a nice bow), and cut that piece of ribbon in half. Using my white tac, I stick one end of each ribbon on each side of my card – making sure it aligns with the edge.
8. With more white tac, I adhere the three stars, starting with the largest, and layering them on top of each other, but making sure to off-set them a little and change the angle with each star. Lastly, I attach the label, still using the white tac. (As I love to have things pop off the background a bit, but I don’t have any of these 3d adhesives, white tac for me is the perfect alternative.)
9. The last thing to do, is to add some more white tac to both ribbons, right on either side of where about the bow will be, and then tie the ribbon into a nice bow.

Voila! It’s a Christmas card, and Christmas may come!


Every saint has a past and every sinner has a future.
Of course, what a fantastic site and illuminating posts, I definitely will bookmark your site.All the Best!