All posts filed under: Digi-Scrap Corner

Freebies Revisited (3)

Anzeige (Enthält Produktempfehlung) / Advertisement (Contains product recommendation) EnglishI want to highlight more of my previous freebies this week, before I start sharing the new freebies that I have in the making. You can find all my freebies when you click on the Freebie tab in the Digi-Scrap Corner menu above, or the freebie tag on the side. If you look for a specific freebie, just type the name of that freebie in the search bar. Enjoy! DeutschIch möchte an ein paar weitere meiner früheren Freebies erinnern, bevor ich anfange, die neuen Freebies zu teilen, die schon in der Mache sind. Ihr könnt alle meine Freebies finden, indem ihr im Menü Digi-Scrap Corner auf Freebies klickt, oder an der Seite auf das Label freebie. Wenn ihr nach einem spezifischen Freebie sucht, könnt ihr den Namen in die Suchleiste eingeben. Viel Spass!

Traveler’s Notebook Layout: Warm Wishes

Anzeige (Enthält Produktempfehlung) / Advertisement (Contains product recommendation) EnglishThis page I began by drawing circles with water color on the page. To get the circles perfectly round, I used something suitable from my household, though I wasn’t going for a perfect look in terms of how I painted the circles. If they turned out a bit messy, that’s exactly what I wanted. Next, I used bubble wrap that I colored with the same shade of watercolor and then dabbed on the areas of the page where I wanted the photos to go. I added some paint splatters and a stamped the little starry motives. With my die cuts I then cut out the banner shapes from the patterned paper (“Winter Forest”) – two for each cluster. I also needed a couple of snowflakes and the label for the title. For that label I used up some of the paper on which I had previously watercolored. Last, I added the photos and finishing touches by arranging the word strips, snowflakes and other elements around the page. …

Traveler’s Notebook Layout: Snow Kissed

Anzeige (Enthält Produktempfehlung) / Advertisement (Contains product recommendation) EnglishFor this layout I mainly used die cuts (“Christmas Pinecone Dies” from Stampin’ Up!) and one strip of paper from the paper pack “Winter Forest.” I layered the die cuts with the photos, and used two different kinds of browns with the pinecones. The title I cut with another of my die cut sets, and also cut little circles, on which I then stamped the rest of the title. I added the paper strips and word strips to the bottom right of the layout, and that finished off my page. You can watch a flip through of this album here: DeutschFür dieses Layout habe ich hauptsächlich Stanzen (Stanzformen Weihnachtszapfen von Stampin’ Up!) und einen Streifen Papier vom Papierpack “Winter Forest” verwendet. Die ausgestanzten Elemente habe ich zusammen mit den Fotos angeordnet, und für die Zapfen habe ich Tonkarton in zwei verschiedenen Brauntönen verwendet. Den Titel habe ich von einem meiner Stanzalphabete ausgestanzt, und die kleinen Kreise sind ebenfalls gestanzt. Dann habe ich den Rest des Titels auf …

Traveler’s Notebook Layout: Winter

Anzeige (Enthält Produktempfehlung) / Advertisement (Contains product recommendation) EnglishThis layout is rather simple. I just cut various paper strips from the patterned paper (“Winter Forest” paper pack), roughed up the edges, and arranged them together with the photos and the word strips. For the title I used one of my die cut alphas. You can watch a flip through of this album here: DeutschDieses Layout ist etwas einfach gehalten. Ich habe verschieden große Papierstreifen vom gemusterten Papier (“Winter Forest” Papierpack) geschnitten, und dann die Ränder aufgeraut. Dann habe ich die Papiere mit den Fotos und Wortstreifen auf der Seite arrangiert. Für den Titel habe ich eines meiner Stanzalphabete verwendet. Du kannst dir das gesamte Album hier ansehen: If you want to see how I created some of my pages, you can check out my Youtube channel here: https://www.youtube.com/channel/UCvV6HqDhnOOguRGRzg76gRA/featured. Wenn du sehen willst, wie ich einige dieser Seiten hergestellt habe, kannst du das auf meinem Youtube channel tun: https://www.youtube.com/channel/UCvV6HqDhnOOguRGRzg76gRA/featured.

Traveler’s Notebook Layout: Winter Fun

Anzeige (Enthält Produktempfehlung) / Advertisement (Contains product recommendation) EnglishFor this layout, I started by cutting a bunch of hexagons from the different patterned papers that came with the paper pack “Winter Forest.” I also used die cuts to create the file tab and title. For the snowflakes I used a snowflake punch, and lastly, I stamped the rest of the title and added the word strips. You can watch a flip through of this album here: DeutschBei diesem Layout habe ich damit begonnen, dass ich die vielen Hexagons ausgestanzt habe. Die Papiere kommen alle von dem Papierpack “Winter Forest.” Stanzen habe ich auch für das Schildchen und den Titel verwendet. Für die Schneeflocken habe ich eine andere Stanze verwendet, und der Rest des Titels ist gestempelt. Zum Schluss kamen noch die Wortstreifen hinzu. Du kannst dir das gesamte Album hier ansehen: If you want to see how I created some of my pages, you can check out my Youtube channel here: https://www.youtube.com/channel/UCvV6HqDhnOOguRGRzg76gRA/featured. Wenn du sehen willst, wie ich einige dieser Seiten hergestellt habe, kannst du …

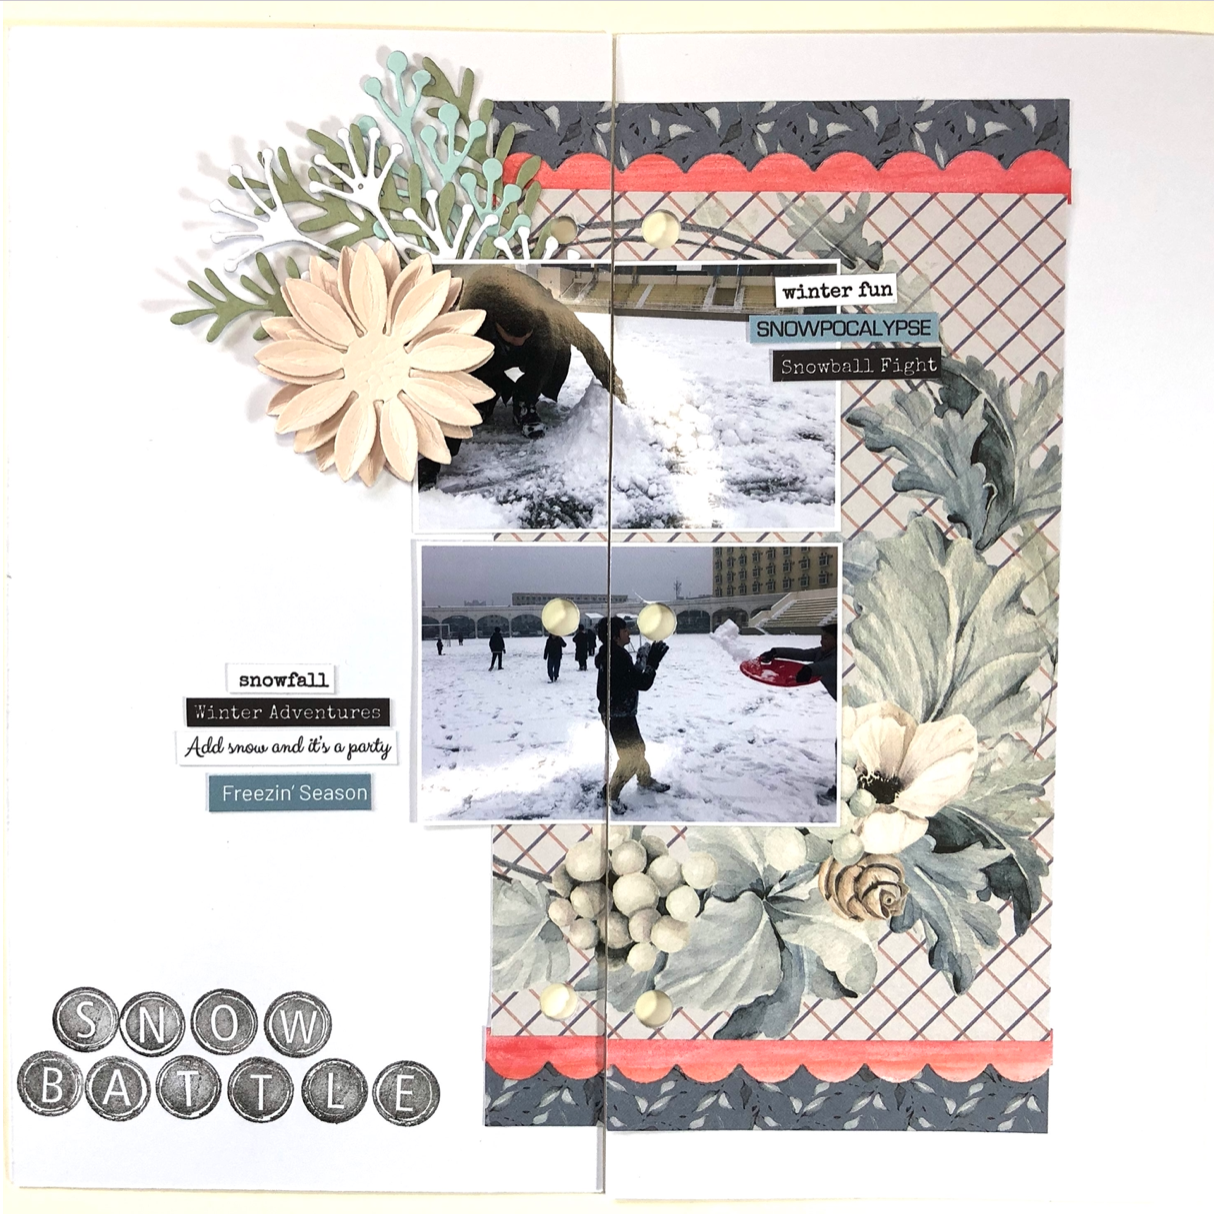
Traveler’s Notebook Layout: Snow Battle

Anzeige (Enthält Produktempfehlung) / Advertisement (Contains product recommendation) EnglishI have another page that I want to introduce to you. This one has a couple of patterned papers from the paper pack “Winter Forest.” With one of my die cuts I also cut a scalloped border. Then I used my die cuts to cut out a bunch of leaves and branches, as well as a flower that I shaped by folding each petal in the middle. Last, I added the word strips, and stamped the title. You can watch a flip through of the entire album if you check out this video: DeutschIch möchte euch eine weitere Seite vorstellen. Diese verwendet mehrere gemusterte Papier vom Papierblock “Winter Forest.” Mit einer meiner Stanzen habe ich auch die Bogenkante ausgeschnitten. Weitere Stanzen habe ich für das Grünzeug und die Blume verwendet. Bei der Blume habe ich jedes Blütenblatt einmal in der Mitte gefaltet, um ihr eine Form zu geben. Zuletzt habe ich die Wortstreifen hinzugefügt und den Titel gestempelt. Du kannst dir ein Video des fertigen Albums hier …

Freebies Revisited (2)

Anzeige (Enthält Produktempfehlung) / Advertisement (Contains product recommendation) EnglishOnce again I want to remind you of some of the past freebies I created and shared here on this blog. If you’re new to mistyhilltops.com, you don’t want to miss out on these as well as many others. If you’re one of the long-term followers, you can look forward to new freebies coming soon. There are also dozens of templates, and several paper projects, so I recommend you click on the tag: FREEBIE, and that will take you to all the past freebies. Enjoy! As always as a reminder: My terms of use apply, which you can find in several places on this blog, e.g. if you hover over Digi-Scrap Corner in the menu. On a last note: Have you noticed that mistyhilltops now also runs a youtube channel? You can check that out here: https://www.youtube.com/channel/UCvV6HqDhnOOguRGRzg76gRA/featured DeutschNoch einmal möchte ich euch auf die vergangenen Freebies aufmerksam machen, die ich für diesen Blog geschaffen und auch hier geteilt habe. Wenn du mistyhilltops.com gerade erst entdeckt hast, dann …

Traveler’s Notebook Layout: It’s a Fabulous Day

Anzeige (Enthält Produktempfehlung) / Advertisement (Contains product recommendation) EnglishThis page I began by stamping that strip of polka dots in the background of the left page. Then I cut a strip of black card stock to back up my photos. I cut a wavy strip of paper using one of my border die cuts, and then from the patterned paper (“Winter Forest”) I cut a label that I then cut in half to tuck one half underneath the photostrip at the top and one underneath the photostrip at the bottom of the page. I also cut some snowflakes and added those, as well as some word strips. For the title I used to different die cuts – one alpha die cut, and one of my smaller circle die cuts to use as a mat underneath the letters. In addition I stamped part of the alpha. Here’s a video of the finished traveler’s notebook mini album: DeutschAuf dieser Seite habe ich damit angefangen, den gepunkteten Streifen im Hintergrund zu stempeln. Dann habe ich einen Papierstreifen aus …

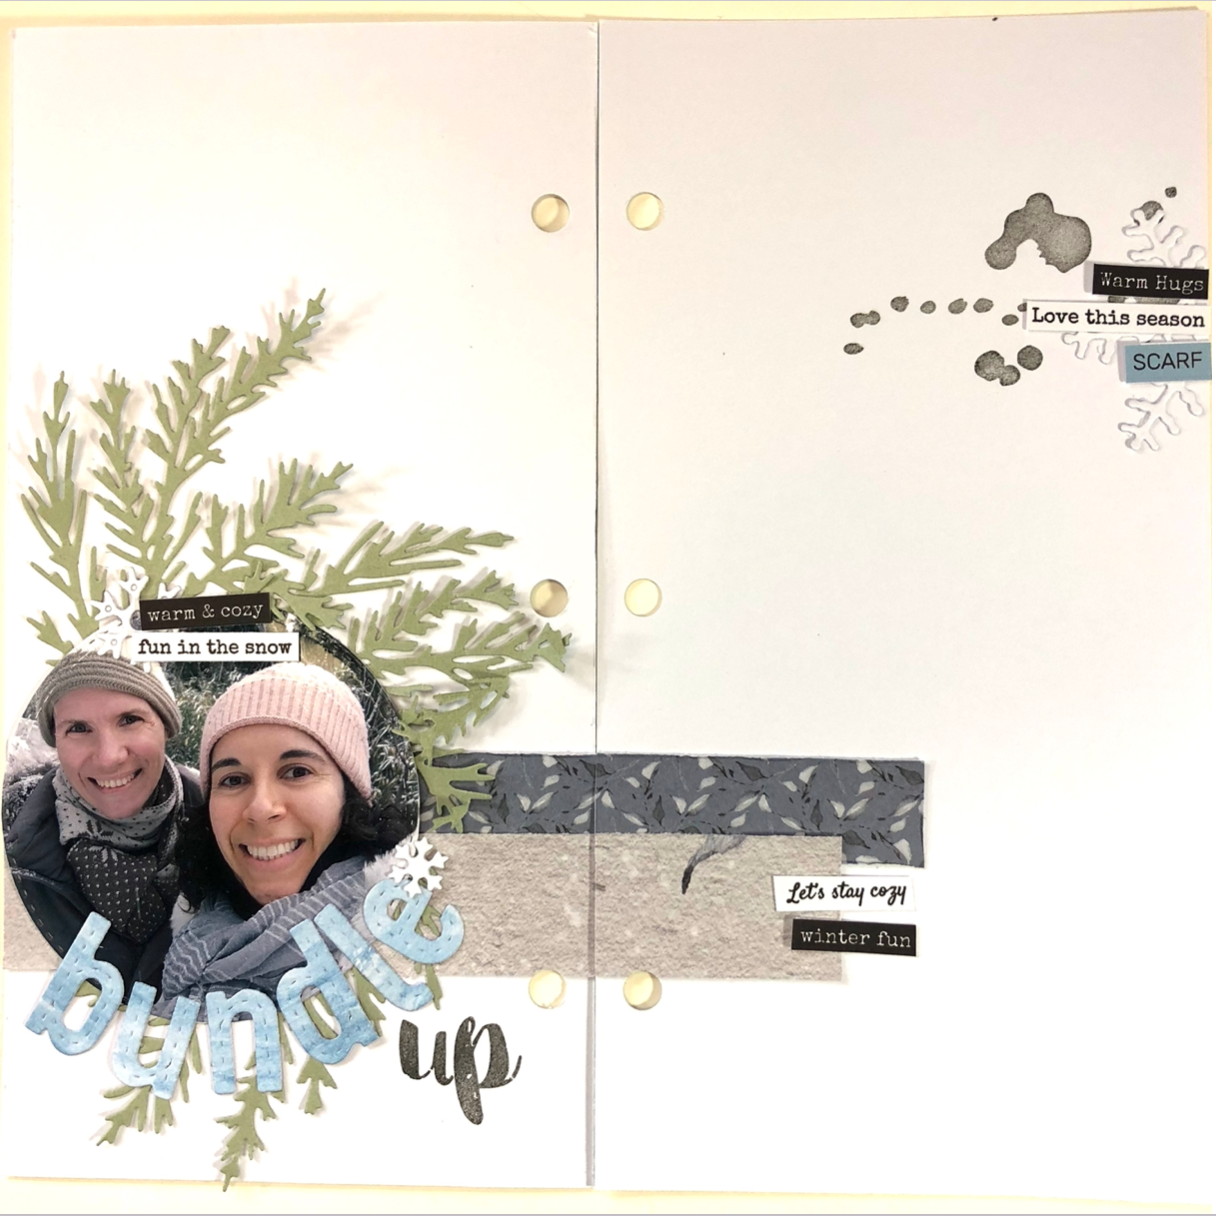
Traveler’s Notebook Layout: Bundle Up

Anzeige (Enthält Produktempfehlung) / Advertisement (Contains product recommendation) EnglishFor this page I started with the two strips of paper from the paper pack “Winter Forest” in the background. I roughed up the edges before sticking down the paper. Then I used a foliage die cut to cut two pieces of foliage, and I used a circle die cut for the photo. For the title, I painted cardstock with blue watercolor, before I used one of my die cut alphas to cut the word “bundled.” I used a scripty stamp alpha to stamp the word “up.” For the little cluster on the right side, I stamped a couple of paint splats. Then I added a die cut snowflake which I cut in half, and added the word strips. If you’d like to watch a flip through of the entire album, you can check out this video: DeutschFür diese Seite habe ich mit zwei Papierstreifen vom Papierpack “Winter Forest” angefangen. Ich habe die Ränder aufgeraut bevor ich das Papier aufgeklebt habe. Für das Grünzeug habe ich eine …

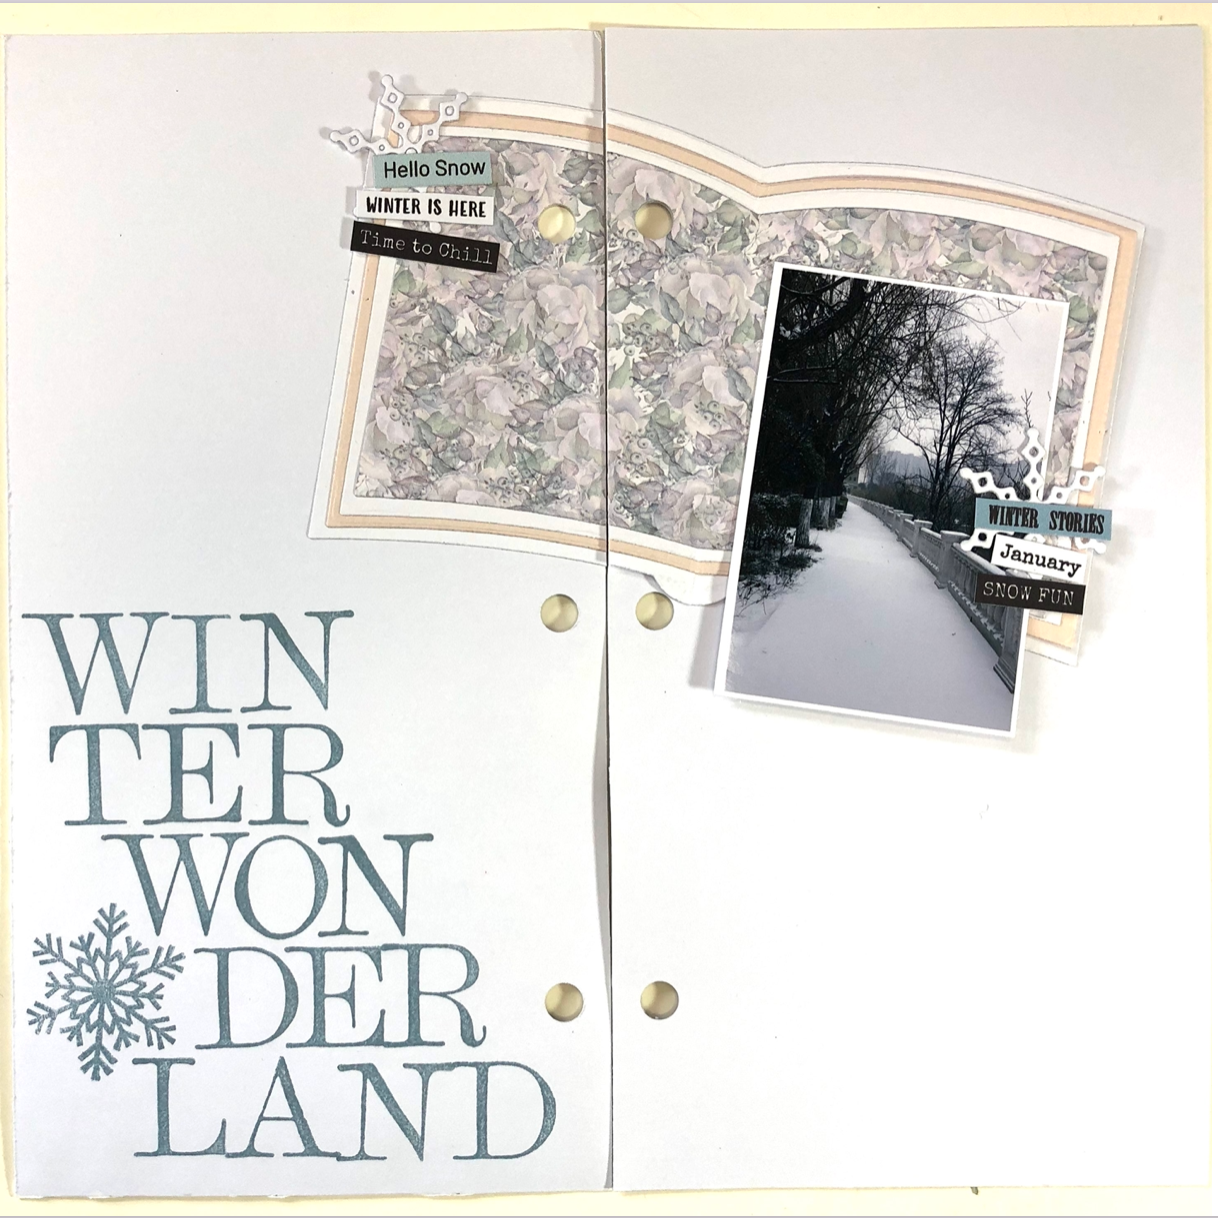
Traveler’s Notebook Layout: Winter Wonderland (2)

Anzeige (Enthält Produktempfehlung) / Advertisement (Contains product recommendation) EnglishFor this layout I used a die cut that resembles a book to cut a number of different papers. I stamped the title, added some snowflakes and word strips, and called the page done. If you’d like to watch a flip through of the entire album, you can check out this video: DeutschFür dieses Layout habe ich eine meiner Schneidestanzen verwendet, die wie ein Buch aussieht. Den Titel habe ich gestempelt, und dann noch ein paar Schneeflocken und Wortstreifen hinzugefügt. Wenn du dir ein Video des fertigen Albums ansehen willst, kannst du das hier tun: If you want to see how I created some of my pages, you can check out my Youtube channel here: https://www.youtube.com/channel/UCvV6HqDhnOOguRGRzg76gRA/featured. Wenn du sehen willst, wie ich einige dieser Seiten hergestellt habe, kannst du das auf meinem Youtube channel tun: https://www.youtube.com/channel/UCvV6HqDhnOOguRGRzg76gRA/featured.