All posts filed under: Cards

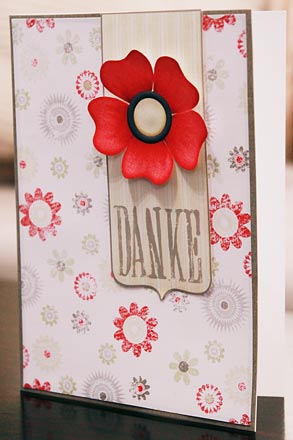
Hybrid Hub: Thank You Card No. 1

I haven’t posted anything about hybrid in a long time. That’s probably, because I haven’t done much hybrid in quite a while. Still, I do have some projects I worked on last year, so I guess, I can start sharing some of what I did in the past. And maybe that will motivate me to get back into doing more hybrid again. Today, I want to show you one of my very first hybrid projects that uses digital scrapbook supplies. It’s a thank-you-card. Now, keep in mind that I am living in China, which means there is no craft store anywhere near the place where I live. Not any craft stores at least as we know them in other places of the world, where they  offer tons of supplies: flowers, ribbons, beads, stamps, etc. So, I have to make do with whatever I have available, and that is basically my printer. So, usually, I just design my cards on the computer, print everything, and assemble. Since digital scrapbook supplies usually come in great quality, printing …

DIY: Christmas No. 4

Christmas is fast approaching, but it’s still time to get those Christmas cards out, so today I’ll bring you another how to on creating your own Christmas card. First, as always, we need to create the card (with all the mats, background papers and embellishments) in our graphic program. This card is a rather simple one, so it only has five printable parts to it: Two background mats, the base for the ribbon, the label and the snowflake. I also used a white ribbon and a piece of string. After creating and arranging the different mats and elements in photoshop, I open a new canvas where I drag and drop everything and arrange it for printing. (Always make sure on the printing canvas to have nothing overlap!) Once I’ve printed everything, cutting and assembling starts. I use white cardstock (size A5) for the base layer, fold it in half and begin to adhere the two background mats on there. The order doesn’t matter, because the ribbon will cover where the two will overlap. I measure …

101209-DIY-IMG_3409

DIY: Christmas Card No. 3

There’s still time to send out those little Christmas greetings, so let me show you another one of my Christmas cards and what I did to create it: The card comes with five parts – two background mats, two center-piece mats and a ribbon. Simple enough, right? I used four different kinds of papers – one patterned one, and the other three ones are plain solid colored. Now, what’s special about this card is that the top layered mat has a lot of writing on it – all words that have to do with Christmas. So, while it took me some time to brainstorm all the different terms, assembling them wasn’t all that hard. Simply pick a lot of different fun fonts and arrange them on the mat until there is no more space left. The trick is: re-size. You can make some words big and bold, others can be quite small. That way arranging everything is a relatively simple task. Once you’ve clipped all the papers and finished arranging the wordart, you can prepare …

101125-IMG_3412

DIY: Christmas Card No. 2

Happy Thanksgiving, fellow digi-scrappers! It’s time for the next round of our Do-It-Yourself tutorial. And since the Christmas season is right around the corner (I just realized that in some places around the world, the 1. Advent will be celebrated this Sunday), I’m going to show you how to make another Christmas card. This week’s Christmas card comes with seven parts: 2 background papers (for the base), 2 mats, 1 label, 1 embellishment, 1 string. You also will need glue (I prefer glue sticks), white  tac, and scissors. 1. Choose the papers and embellishments that you want to work with. My choice for this card was “All That’s Timeless” by Traci Reed and Meghan Mullens (available at SSD). 2. In your graphics program (I use Photoshop), open a new canvas the size of what the card will be (mine will be A6). 3. Now, with the shape tool (set to rectangle) I create four rectangles of different sizes, each on its own layer. The largest will cover the entire canvas and is the background, on …

DIY: Christmas Card No. 1

Today, I’m bringing you the first ever Do-It-Yourself tutorial on my blog! We are going to create a Christmas card and I will take you through the process step by step. Before we get started though, I should point out that being in China I don’t have access to all the wonderful craft supplies available in other places around the world, so there will be a lot of improvising, and for those with only a small budget available for their crafting, I’ll show how you can save on paper and supplies as we move along. 1. Choose a scrapbook kit or whatever papers you want to work with from your digiscrap stash. I chose “Joy to the World” by Kristin Cronin-Barrow (her Christmas kit is still available at the Sweetshoppe). 2. Open your graphic designs program and create the basic design. In my case, I decided to go with a bright background paper on which I will layer all the other papers and embellishments. I used Melissa Bennett’s “Matted” star (also SSD) to duplicate, resize …