Anzeige (Kann Produktempfehlungen enthalten) / Advertisement (May contain product endorsement)
English
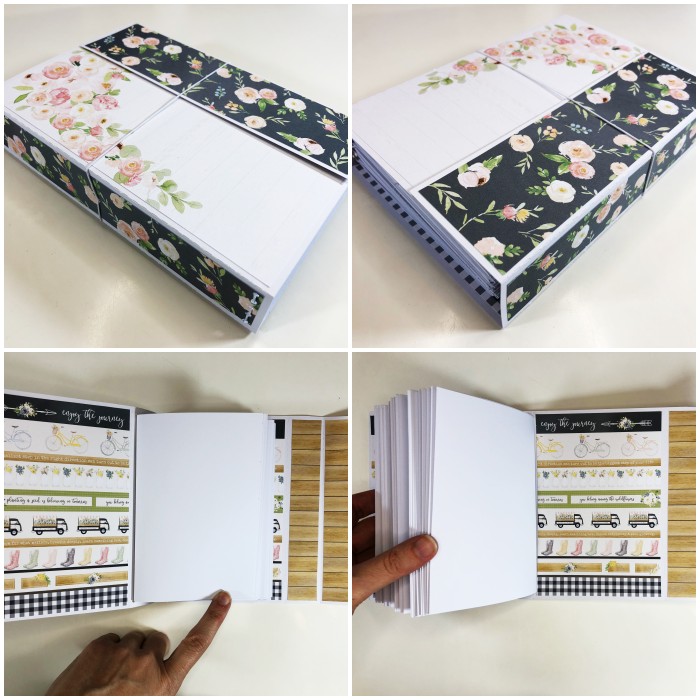
Spring has arrived in my corner of the world, and being a memory keeper, I want to be able to collect the memories from this season. So, I recently started a new mini album, and I made it in the style of a traveler’s notebook. Except, it’s smaller in size. Just 4×6 in.
Deutsch
Der Frühling ist angekommen, und da ich ja Erinnerungen sammle, möchte ich auch die besonderen Momente dieser Jahreszeit festhalten. Also habe ich ein neues Minialbum angefangen, und es im Stil eines Traveler’s Notebooks zusammengestellt. Es ist nur ein wenig kleiner als ein TN.

You Need:
Was ihr braucht:
It’s super easy to put together. All you need is:
- Cardstock
- Adhesive
- Patterned paper
- Paper trimmer
- Score board (if possible)
- Small hole puncher
- Elastic
(A digital cut file will be shared on this site sometime in the future, so keep checking. But even without a cut file, this is super easy to create.
Dieses Album ist ganz leicht erstellt. Ihr braucht nur:
- Bastelkarton
- Kleber
- Gemustertes Papier
- Papiertrimmer
- Falzbrett (wenn ihr habt)
- Locher mit kleinen Lochmöglichkeiten
- Gummiband
(Eine digitale Version gibt’s irgendwann in der Zukunft hier zum Herunterladen. Aber auch ohne die Schneidedatei ist das Ganze super einfach erstellt.
Here is what I do:
Und so geht’s:
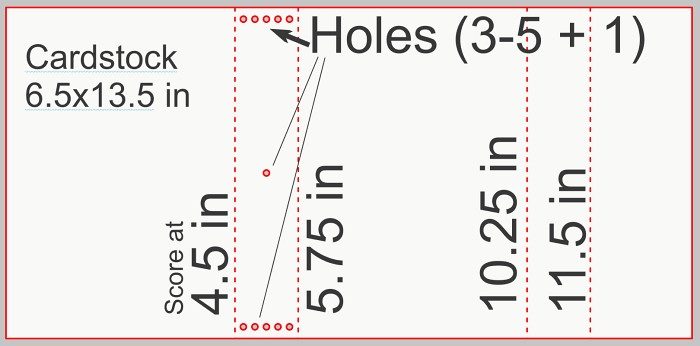
From plain cardstock (I recommend a thicker kind), cut and score your cover base according to the measurements listed here:
Vom Bastelkarton schneidet und falzt ihr die Hülle des Albums in den folgenden Maßen:
- Kartongr¨oße: 16,5 x 34,2 cm
- Falzlininien: 11,4 cm, 14,6 cm, 26 cm, 29,2 cm

Add holes as depicted in the illustration above. How many holes you want to add is up to you. I recommend anywhere between 3 and 5. Do this at the top and the bottom. I recommend no more than 1/8 of an inch from the edge. Don’t forget the single hole in the center.
Locht den Karton, wie ihr es oben illustriert seht. Wieviele Löcher ihr zufügen wollt ist euch überlassen. Ich empfehle zwischen 3 und 5 oben und unten. Sie sollten nicht mehr als 5 mm vom Rand entfernt sein. Und vergesst nicht das einzelne Loch in der Mitte.
Cut your papers to size using the guide.
Schneidet eure gemusterten Papiere zurecht. Hier sind die Angaben in cm:
15,9×2,6 – 3x (Seiten)
15,9 x 10,8 – 4x (Vorder- und Rückseite)
15,9 x 4,5 – 2x (Klappe)

Adhere the papers to both sides of the cover. Just the inside part or the area that has the holes I leave uncovered.
Klebt die Papiere auf den Bastelkarton. Nur die Innenseite der gelöcherten Fläche bleibt frei.

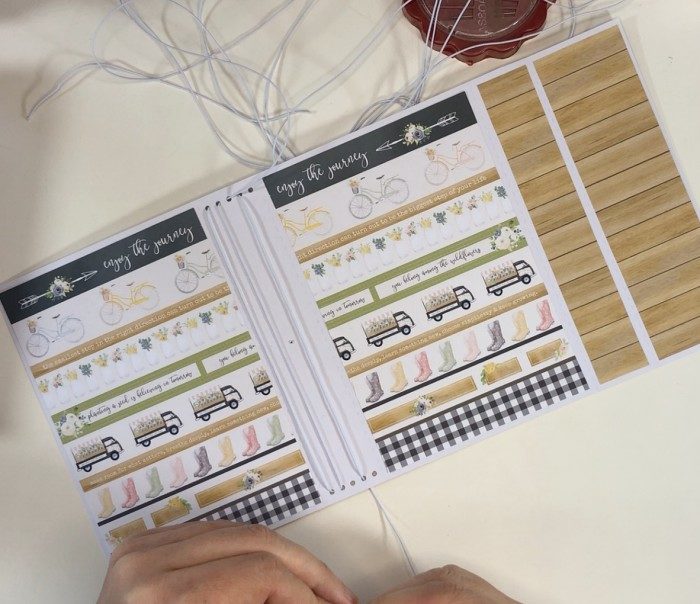
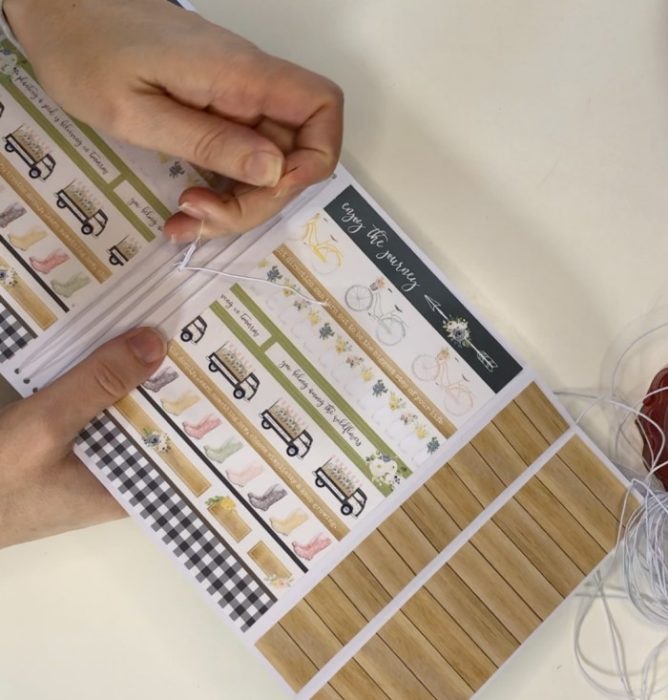
String the elastic through the holes. I recommend you watch the video tutorial on Youtube. How to string the elastic starts at around 13 min.
Zieht das Gummiband durch die Löcher. Ich empfehle, dass ihr euch die Videoanleitung hierzu auf Youtube anseht (Gummiband Anweisungen starten bei Minute 13). Auch wenn es auf englisch ist, hilft euch die Veranschaulichung sicher weiter.
Don’t forget the elastic that goes through the center hole. Finally, fold your album cover, and add the inserts (6×8 in, folded at 4 in to create two 4×6 in pages).
Vergesst auch nicht das Gummiband, das durch das Loch in der Mitte gezogen wird. Dann kommen die Seiten. Die sind 15,24×20,32 cm groß (6×8 Zoll), und in der Mitte der langen Seite gefaltet, sodass zwei 10,16×15,24 cm (4×6 Zoll) große Seiten entstehen.

Cut a bunch of pages this way, and pull them through the elastic.
Schneidet euch so viele Seiten, wie ihr meint sie passen in euer Album, und zieht sie durch das Gummiband.
Here is the video tutorial for this:
Hier ist die Videoanleitung (leider nur auf englisch, aber vielleicht geht es auch mit Untertiteln).
Have fun recreating this.
Euch nun viel Spass beim Nachbauen.


