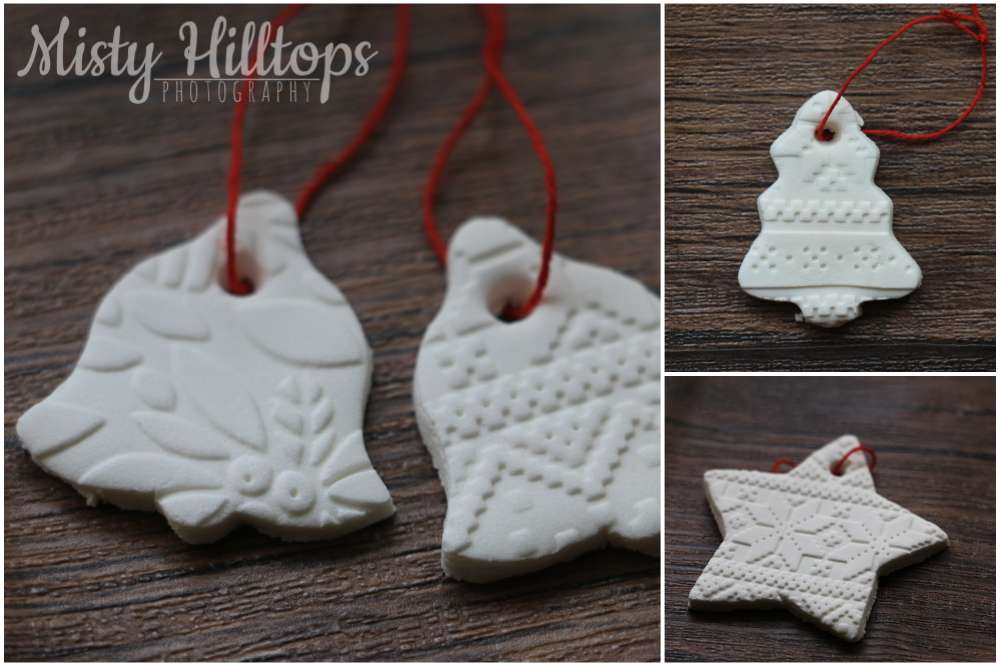
DIY: Weihnachtanhänger aus weißem Ton
I’ve got something really fun today that I’ve been meaning to share with you. Last week, I came across some really cute Christmas ornaments that I couldn’t wait to try out myself. Turns out, these don’t just look fabulous, they’re also super easy to make, and almost guarantee instant success. I found the inspiration and instructions for it HERE, but just to save you the trouble, here’s how it works …
Habe heute was ganz Besonderes für euch, dass ich euch mal zeigen wollte. Letzte Woche bin ich über so ein paar hübsche Weihnachtsanhänger gestoßen, die mich sofort inspiriert haben. Musste das gleich ausprobieren. Und zum Glück für mich, hatte ich alle Zutaten auch zur Hand. Es stellte sich heraus, dass die Anhänger nicht nur toll aussehen, sondern auch super einfach zu machen sind. Ich habe die Inspirationen und Anleitung dafür HIER gefunden, aber um euch Zeit zu sparen, so geht’s …
You will need:
1 cup baking soda
1/2 cup cornstarch
3/4 cup (warm) water
Zutaten:
120g Natron
60g Maisstärke
85g (warmes) Wasser
Mix all ingredients into a saucepan, and heat over medium heat. Continuously stir until everything resembles the consistency of play dough.
Let it cool. Then roll out the dough until appr. 4 mm thick. Use cookie cutters to cut out shapes. And don’t forget to make holes for hanging your ornaments, too. place on a baking pan laid out with baking paper.
Bake at about 170°F for about 40 to 60 minutes (depending on the oven). (Or air dry, which might take a day or two, but prevents cracking.)
Alle Zutaten in einen Topf geben und unter ständigem Umrühren erhitzen bis der Teig die Konsistenz von Plätzchenteig oder Knete erhält.
Teig abkühlen lassen, auf glatter Fläche ca. 4 mm dick ausrollen. Mit Plätzchenformen ausstechen und auf einem Backblech mit Backpapier arrangieren. Vergesst nicht, kleine Löcher zum Aufhängen zu stechen. Dann bei 80°C ca. 1 Stunde backen. (Mein Ofen fängt bei 100°C an. Habe die Backzeit auf 40 Minuten verkürzt, und die Ofentüre ein bischen offen stehen lassen.
Tip: Patterns
Achieving patterns on your ornaments is super easy. I used the embossing folders I have for my Sizzix, but you can work with anything that provides some kind of texture for a pattern. Like stamps, a sweater with a large knitting pattern, etc.
Just press the pattern into the rolled out dough before you cut them with the cookie cutters. (If you choose to use a sweater or other type of fabric, I recommend you have a piece of cardboard at hand, to help you achieve a consistent depth on your dough. Layer the cardboard on top of your sweater, and press down on the cardboard. I’m sure you’ll achieve more of a consistency that way that pressing the fabric on the dough with your bare hands.)
Tipp: Muster
Schöne Muster auf den Anhängern zu erzielen ist super einfach. Ich habe Embossingschablonen verwendet, die ich für meine Sizzix zur Hand habe. Aber ihr könnt alles nehmen, was irgendwie Struktur hat – Stempel, Strickpullover, etc.
Einfach vor dem Ausstechen der Formen die Struktur in den Teig drücken, dann wie gehabt vorgehen. (Wenn ihr einen Pullover verwendet, rate ich, noch ein Stück Pappe zu benutzen. Damit drückt ihr das Muster schön gleichmäßig in den Teig. Einfach Pappe auf den Stoff legen, und dann in den Teig drücken. Wenn ihr nur mit der Hand den Stoff in den Teig drückt, wird das bestimmt weniger gleichmäßig.)


