Day: December 27, 2011

The Christmas Aftermath

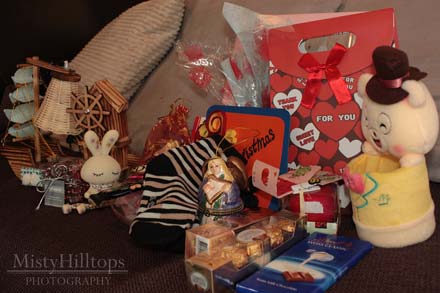
Christmas is over now, but since I’ve been blessed with more presents than usual this year, I’d like to share what I got with you. (After all, why should I keep all the joy of these Christmas presents just for myself?) Now, keep in mind that the one who got the presents was … Me (that’s a grown-up with a love for subdued colors, and a fully furnished apartment). And here goes the list … a little plush container for pens and pencils an apple candle an all pink picture frame some red and silver Christmas decoration striped socks with stocked with chocolate and pralines a colorful porcelain angel a rabbit with long hanging legs (decoration on a shelf) apples & oranges a wood boat that also is a lamp a handcrafted Christmas card more chocolate and candy sunflower seeds   So, whether I’ll be able to find use for all these presents, that’s a question I’ll allow you to answer yourselves.

Behind the Scenes: Create Your Own Layered Christmas Tree

Christmas 2011 officially now is a thing of the past. But for us scrappers the good news is that our holiday scrapping is just beginning, since I’m sure that most of us have a lot of memories that we want to preserve with your layouts. It’s the perfect timing, therefore, to bring you this little tutorial on how to create your own paper clipping Christmas tree. Check out my DD cover page, and the tree you see there is what you’ll learn to do in today’s tutorial:   In this tutorial you will learn how to …   … create your own clipping masks using a custom shape; … rasterize the custom shape; … divide the custom shape into various fields/shapes by using the Eraser Tool.   Here’s how it works … I’m assuming that you’ve already opened your canvas, and are ready to start …   STEP 1 |  Create a Triangular Shape The first thing we need to do is create a triangular shape. Simply press U to bring up the Custom Shape …